Linking to Google Analytics
Website and blog access information from Google Analytics can be displayed in the Site Stats widget on the dashboard.
This relies on the Google API Console to connect and share information, which requires the use of the OAuth2 application. More information on the Google API Console is in Google API Console help.
Setting up the Google Analytics API.
- From System Overview, select a website or blog.
From the left menu, click Settings and then Web Services.
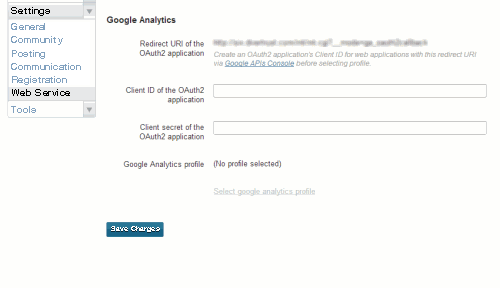
Click the Google APIs Console link, located near the top of the settings screen.
- You will be directed to the Google Cloud Console screen. Click Create Project.
The New Project window should appear. Enter the following information:
- Project Name: The name of your project
- Project ID: Your project ID (the default value can be left as is)
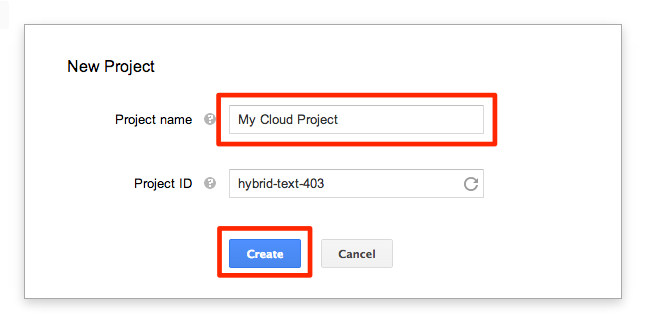
Make sure the information entered is correct and then click Create.
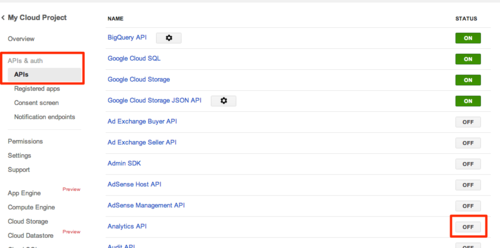
- Once the project has been created, select APIs under APIs & auth.
From the main overview menu, search for Analytics API and then change the status to ON.
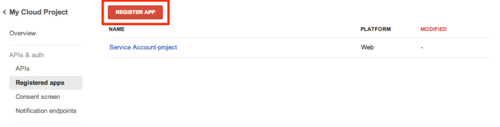
Select Registered apps from the left hand menu.
Click the Register App button at the top of the screen.
The Register New Application popup window should appear. Enter the following information:
- Name: The name you want to use for your app
- Platform: Select Web Application
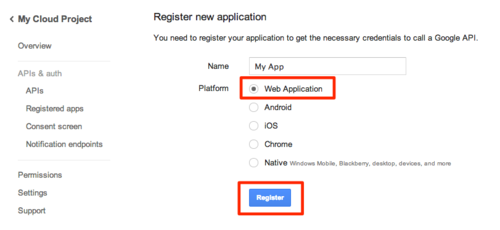
Make sure the information entered is correct and then click Register.
Once the application is registered, you will be returned to the previous page. Click OAuth 2.0 Client ID.

Enter the Web Origin and Redirect URI for your app.
- Web Origin: The URL domain. For example, if the application URL is
http://www.example.com/cgi-bin/mt/mt.cgi?__mode=ga_oauth2callback, you would enterhttp://www.example.com. - Redirect URI: Copy the Authorized URI displayed on the Movable Type Google Analytics screen and paste into the field.
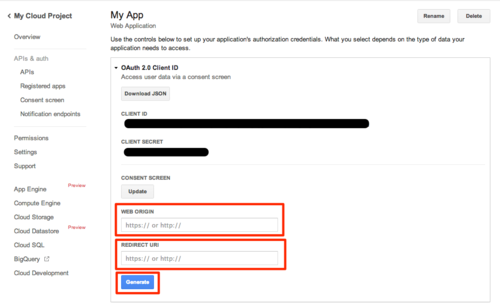
- Web Origin: The URL domain. For example, if the application URL is
Make sure the information is correct and then click Generate.
- A Client ID will be generated based on the information provided.
Copy and paste the Client ID and Client Secret into the appropriate fields on the Google Analytics settings screen.
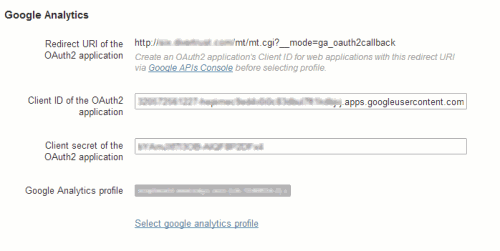
Click on the “Select Google Analytics profile” link at the bottom of the settings screen and an access permission (or account selection) popup window will appear.
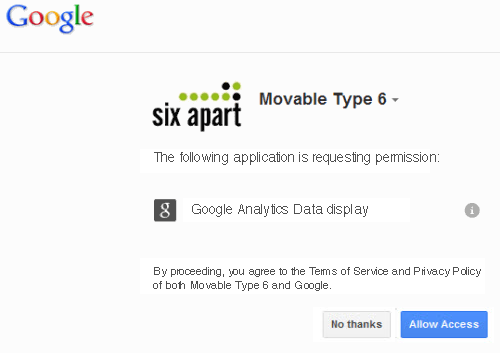
Once permission has been granted to the specified Google account, the popup window will close and you will be directed to the profile selection module window.
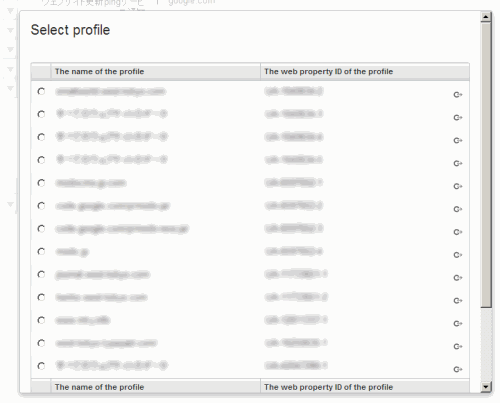
Select the profile you want to use and then click OK. The Google Analytics profile linked to the selected profile will be displayed.
- Click Save Changes.