Setting Up “Rainier”
About "Rainier"
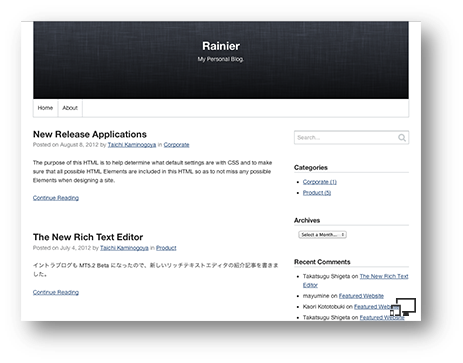
Rainier is a multi-device compatible theme based on Media Queries (CSS.) It can evaluate how the user accesses a blog or site, such as through a PC, smart phone, tablet, etc., and then adjusts the size and design of the page to best fit the device. Rainier also offers theme, design and navigation customization options.
Rainier's Functions
Rainier features the following functions:
- Default blog title text can be replaced with a custom title image
- Default header can be replaced with a custom header background image
- Custom favicon can be uploaded using the item upload function
- Specified web pages can be added to the navigation bar
- The og:image thumbnail image option can be customized
- The 10 most recent blog articles are displayed on the home page. Also, through the use of the mt-search.cgi function, pagination can be set for 10 articles per page.
- Bread crumb navigation is available (excluding the home page, error page and search results page)
- After theme application, Rainier supported style sheets can be applied through the blog entry editor screen.
- Classic Blog designs (such as the Cityscape series and the Minimalist series) can become multi-device compatible via Media Queries. However, regardless of the chosen layout, the 2-column right hand side-bar layout cannot be changed.
About Media Queries
Media Queries is a CSS3 module and is recommended as the standard for web page rendering by the World Wide Web Consortium (W3C). It adjusts page size, CSS and layout to best fit the device used to access the page.
In Rainier's default state, certain layout changes will be made depending on the following conditions:
- Page widths over 930 px:
- 2 column layout, menu displayed in full
- Page widths over 700 px but under 930 px:
- 1 column layout, menu is only displayed in the header, some elements (such as the search function) are centered
- Page widths under 700 px:
- 1 column layout, menu is only displayed in the header, grid layouts are unsupported, some elements (such as the search function) are centered
Customizing Rainier
Built in features make changing the header banner and theme, among other design elements, very simple. Let's learn about the different ways in which Rainier can be customized.
Customizing the blog title appearance
In Rainier's default state, the blog name will be displayed as text in the blog header. This text can be replaced with an image of the user's choosing.
- From the upper left hand menu on the user dashboard, go to the desired blog.
- Click on [Assets] => [New] from the left hand menu.
- Click [Select File] and upload an image. (The recommended image width is at least 200 px.)
- Click on the uploaded image.
- Enter @SITE_LOGO into the "tag" field and then click the [Save Changes] button at the bottom of the page.
Once the page has been rebuilt, the uploaded image will have replaced the default blog title text header.
Customizing the blog header background
In Rainier's default state, the header background is set to a solid black color. This background can be swapped with an image of the user's choosing.
- From the upper left hand menu on the user dashboard, go to the desired blog.
- Click on [Assets] => [New] from the left hand menu.
- Click "[Select File] and upload an image. (The recommended image size is at least 1024 px wide by 768 px high)
- Click on the uploaded image.
- Enter @SITE_COVER_IMAGE into the "tag" field and then click the [Save Changes] button at the bottom of the page.
- Once the page has been rebuilt, the uploaded image will have replaced the default header background.
Adding a specific web page to the main navigation bar
It is possible to set a link to a specific web page into the navigation at the bottom or top of a blog or web site.
- From the upper left hand menu on the user dashboard, go to the desired blog.
- Click on [Assets] => [New] from the left hand menu.
- After typing a title and summary, enter @ADD_TO_SITE_NAV into the "tag" field and click the [Save Changes] button at the bottom of the screen. Then, rebuild the page.
When creating a blog or website, it's generally a good idea to create an "about page", which gives a general idea of what the blog or site is about and or some background on the blog or site creator. Let's try adding a link to the "about page" into the navigation bar.
- From the upper left hand menu on the user dashboard, go to the desired blog.
- Click on [Assets] => [New] from the left hand menu.
- After typing a title and summary, enter @ABOUT_PAGE into the "tag" field and click the [Save Changes] button at the bottom of the screen. Then, rebuild the page.
Setting an og:image
The og:image function is used when linking blog entries to social media sites like Facebook. By setting an og:image to an article, the specified image will be used as a thumbnail image alongside the text link.
- From the upper left hand menu on the user dashboard, go to the desired blog.
- Click on [Assets] => [New] from the left hand menu.
- Click "Select File" and upload an image. (The recommended image size is at least 320 px wide by 320 px high)
- After typing a title and summary, enter @SITE_ICON into the "tag" field and click the [Save Changes] button at the bottom of the screen. Then, rebuild the page.
Other Functions
Let's talk about some other useful functions available through Rainier.
Editing the Copyright
Let's try changing the copyright information displayed at the bottom of the blog entry page.
- From the upper left hand menu on the user dashboard, go to the desired blog.
- Click on [Assets] => [New] from the left hand menu.
- Open the template module footer banner editor. The first line of text is the copyright information. Change it to say whatever you want.
- Click the [Save Changes] button at the bottom of the page, and then rebuild to view the changes.
Setting a Favicon image
A favicon, also known as a shortcut icon, is a small graphic, usually 16 px by 16 px, that is displayed in the browser's address bar or next to the page address in the bookmark list. Follow the steps below in order to set a customized favicon for your page.
- From the upper left hand menu on the user dashboard, go to the desired blog.
- Click on [Assets] => [New] from the left hand menu.
- Click "Select File" and upload a favicon file. (both .ico and .png files are supported.)
- Click on the uploaded favicon file and then enter @SITE_FAVICON into the "tag" field.
- Click the [Save Changes] button at the bottom of the page, and then rebuild to view the changes.
Applying a Design
The Rainier theme allows the use of Movable Type 4 classic blog style sheets.
- Caution? If you already have a header image set, you will need to first follow the directions below to delete the current header:
- Open the editor for the current header banner background.?It may be useful to create an "@SITE_COVER_IMAGE" filter for the item list column.?
- Delete the previously set @SITE_COVER_IMAGE tag.
- Save, and then rebuild the index template.
- Click on [Design] => [Styles] from the blog's side menu.
- From the blog style selection screen, click on either [Default Styles] or [MT4 Style Library] from the [Categories] menu.
- Click on the thumbnail image for the style you want to select.
- More detailed information for the selected style will be displayed.
- Click the "[Apply Design] button to apply the selected design.
Restoring the Rainier default settings
To restore the default settings for Rainier, follow the directions below:
- Click on [Design] => [Styles] from the blog's side menu.
- On the blog style selection screen, click on [Styles for Rainier] from the category menu.
- Select the displayed style thumbnail image.
- More detailed information for the selected style will be displayed.
- Click the [Apply Design] button to apply the selected design.