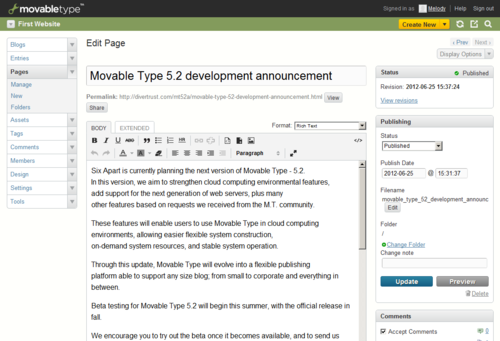
Creating and Publishing Pages
<p>Pages are a new feature of Movable Type that enable you to create standalone web pages that inherit the design of your website or blog. To create and publish a new page:</p>
Movable Type 5
You can create a webpage in Website or Blog.
- Select [Website] or [Blog] under the Navigation
- Select [Pages] > [New] in the Side Menu
Movable Type 4
- Navigate to the blog in which you wish to create a new page by using the blog selection menu.
- Create > Page in the main menu. This will display the Create Page screen.
Page Fields
The following page fields are available in Movable Type.
Page Title. Use this field to title your entry. It is displayed on your blog using the
MTPageTitletag.Body. Use this area of the Create Page screen to compose the body of your page. Movable Type supports a variety of different text editing and formatting options. The body is displayed on your blog using the
MTPageBodytag.Extended. Use this area of the Create Page screen to compose any extended text of your page. The extended page is displayed on your blog using the
MTPageMoretag.
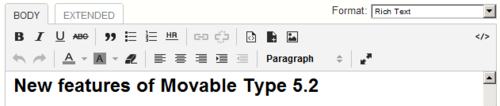
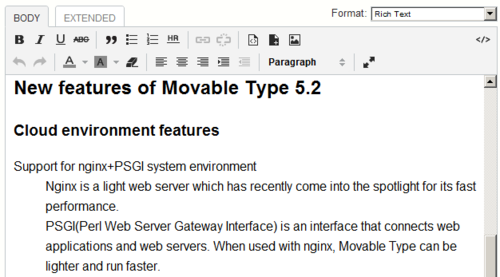
Rich Text Editor (from Movable Type 5.2)
Entering rich text edit mode
By choosing the “rich text” format option, the user’s text input field will switch to WYSIWYG mode.
Rich text interface changes
All buttons have been redesigned, and the editor now supports HTML styling.
HTML editing mode
By clicking the [</>] button located in the top right corner of the editor, the input mode will change to plain or HTML editing mode. Click the same button again to return to WYSIWYG editing mode.
Button function
| Button | behavior | code |
|---|---|---|
| defines strong text | <strong>Text</strong> | |
| defines emphasized text | <em>Text</em> | |
| defines unhdeline text | <span style=”text-decoraton:under-line;”>text</span> | |
| defines strikethrough text | <del datetime=”YYYY-MM-DDTHH:MM:SS”>text</del> | |
| insert link | <a href=”url”>Text</a> | |
| remove link | n/a | |
| defines blockquote | <blockquote>Text</blockquote> | |
| define indent | <p style=”padding-left: 30px;”>Text</p> | |
| remove indent | remove one indent element(-30px) | |
| defines unordered list |
<ul> <li>text</li> </ul> |
|
| defines ordered list |
<ol> <li>text</li> </ol> |
|
| aligns text to the left | <p style=”text-align:left;”>text</p> | |
| aligns text in center | <p style=”text-align:Center;”>text</p> | |
| aligns text to right | <p style=”text-align:right;”>text</p> | |
| insert image files | n/a | |
| insert asset files | <a href=”FileURL”>File</a> | |
| undo operation | n/a | |
| redo operation | n/a | |
| remove format | n/a | |
| insert horizontal line | <hr /> | |
| switch to fullscreen mode | n/a | |
| defines text color | <span style=”color:#ff0000;”> | |
| defines background color of text | <span style=”background-color:#ff0000;”>text</span> | |
| defines text format | <hn>Text</hn>, <pre>Text</pre>, <p>Text</p> |
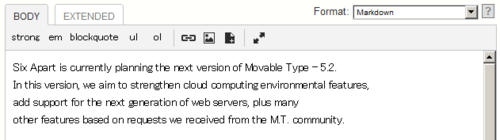
Format modes other than WYSIWYG
For any other format selected, as well as sub-formats, such as [html editing mode] inside [rich text] format, the buttons and options within the editor will change accordingly.
Choosing tag options while text is selected
With text selected, the opening and closing tags will be inserted before and after the selection. The cursor will then appear immediately following the closing tag.
Examples:
<strong>Text</strong>|
Choosing tag options without selecting text
The opening tag will be inserted before the cursor. If the same button is clicked again, the corresponding closing tag will be inserted next to cursor, with the cursor moving to a new position following the tag.
Examples:
<strong>Text Foo Bar
<strong>Text</strong> Foo Bar
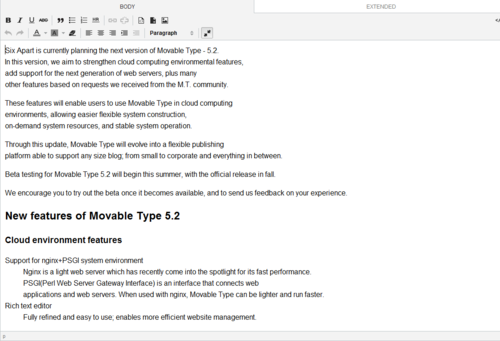
Full screen mode
By clicking the [full screen button], the display will change to full screen mode. If the same button is clicked again, the display will return to the default size.
Default
Full Screen
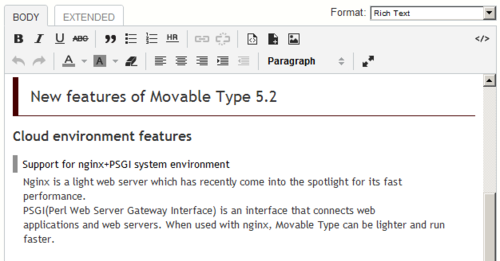
Defining CSS for the text editor
You can now define your own CSS specifications for the text editor. This in turn makes it possible to easily assign different graphic styles between blog entries and web pages.
How to define CSS
Click [Settings] > [Compose] in the website/blog navigation menu. Then, link the style sheet using the full URL address, or other way. The CSS file should become effective on the defined website/blog after clicking the [Save Changes] button.
Before CSS definition:
CSS definition

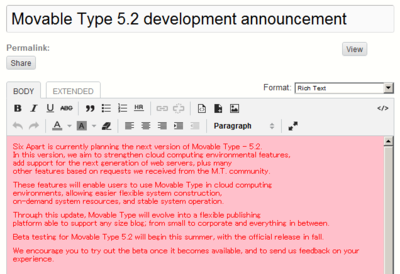
After CSS definition:
Switching the CSS class between Entry and Page
When using rich text mode, Movable Type can specify different graphic styles for blog entries and web pages via the linked to style sheet.
Defining the two classes [body.page] and [body.entry] makes it easier to individualize graphic styles between pages and entries.
Example: Using different text styles
In this case, we want the blog’s text and background to look different than the rest of the site. The corresponding style sheet would look something like this:
body {
    font-family: serif;
}
body.entry {
    background: pink;
}
body.entry p {
    color: red;
}
body.page {
    background: green;
}
body.page p {
    color: yellow;
}
By linking this style sheet, we get this effect:
Website Page
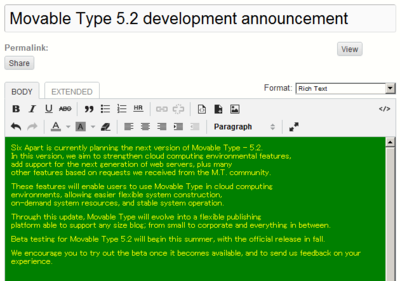
Blog Entry
Defining the CSS for the text editor in Theme
You can also define the CSS file for the text editor in the theme.yaml file within the Theme.
| Value | results (in case the URL is “http://www.example.com/mt/mt.cgi”) |
|---|---|
| /path/to/cssfile.css | Define the CSS as URL (http://www.example.com/path/to/cssfile.css) |
| {{theme_static}}path/to/cssfile.css | Define the css as theme’s file (http://www.example.com/mt/mt-static/support/theme_static/path/to/cssfile.css) |
| https://www.example.com/styles.css | Define the CSS as original value(URL) (https://www.example.com/styles.css) |
Set-up explanation for theme.yaml
The CSS in theme.yaml is set-up like this:
elements:
  default_prefs:
    importer: default_prefs
    data:
    content_css: "{{theme_static}}path/to/cssfile.css"
Here is the sample code for Movable Type’s original theme, “Pico”:
label: Pico
id: pico
author_name: Six Apart, Ltd.
author_link: http://www.movabletype.org/
version: 1.0
class: blog
protected: 1
description: <__trans phrase="Pico is the microblogging theme, designed for keeping things simple to handle frequent updates. To put the focus on content we've moved the sidebars below the list of posts.">
thumbnail_file: thumb.png
thumbnail_file_medium: thumb-medium.png
thumbnail_file_small: thumb-small.png
elements:
  default_prefs:
    importer: default_prefs
    data:
      content_css: "{{theme_static}}style_library/test.css"
  template_set:
    component: core
    importer: template_set
    name: template set
    data:
      label: Pico
...
Metadata section
Tags. Use this field to enter tags for your page. Learn more about tagging entries and pages and managing a blog’s tags. Tags are displayed on your blog using the container tag
MTPageTags.Excerpt. Use this field to enter an excerpt for your page. Page excerpts are not in any of Movable Type’s default templates, but can be displayed on your blog using the tag
MTPageExcerpt.Keywords. Use this field to assign keywords to your page. Keywords for pages can be displayed on your blog using the tag
MTPageKeywords
Publishing section
- “Save Draft” Button - Save as “Unpublished (Draft)”.
- “Publish” Button - Publish a blog entry or webpage to the site.
- “Update” Button - Make changes to published content.
- “Unpublish” Button - Unpublish a blog entry or webpage and revert to draft status.
“Delete” Button - Delete a blog entry or webpage.
Publish Date. Use this field to set the publish date for your page. If you set the publish date for the future, Movable Type will publish the page on that date, as long as your system administrator has configured a cron job for running periodic tasks. Learn more about running periodic tasks.
Filename. Movable Type will automatically populate this field with a file basename for your page. For example, if your entry title is “This is a new page” the page filename will be “this-is-a-new-page”, and hyphens will be converted to underscores depends on the Archive File Path Specifiers. If your default file extension for entries is set to “html” the full file name of the page will be “this_is_a_new_page.html”.
Folder. Use this area of the Create Page screen to assign your page to a folder. By default, Movable Type will publish new pages to the root of your blog’s publishing path. To assign it to a folder, click the “Change Folder” link, which will display a list of folders you can choose from. Learn more about managing folders.
Change Note If the revision history (Movable Type 5 only) is activated, save a memo regarding saved revisions.
Status
The status of the edited content. If you activate the revision history ( on Movable Type 5 ), you can restore previous items saved in the history.
Feedback section
Accept Comments / TrackBacks. Use this section to set whether comments or TrackBacks will be accepted on the page. The default for new pages can be set by your blog administrator (or by you if you have blog administration rights) through the New Entry default settings. (Setings for new pages inherit the settings for new pages). Learn more about new Entry settings in Movable Type.
Outbound TrackBack URLs. Use this field to enter URLs for sending TrackBack pings when your page is published. Movable Type can be configured to automatically discover TrackBack endpoints to ping when you save and publish your page. Learn more about configuring TrackBack settings in Movable Type.
Auto-saving
The system will automatically save your entry to the database every 30 seconds, after your cursor has left the Entry Title field. The system saves your entries to a separate table from the main entry table, and makes recovered entries only available to the user who was editing the entry when it was auto-saved. If the system has an entry available for you to recover, it will present a message at the top of the Entry editing screen.
Display Options
- Use the display options tool on the right hand side of the screen to select which editor fields you wish to display on the Create Page screen.